Selecting a Paran Point

Contents
Paran lines are lines of latitude, indicating where any two astronomical bodies (eg. planets or stars) are in an angular relationship which coincides with the angular relationship between the MC/IC axis and Asc/Dsc axis of a chart at that latitude. For example, if the angle between the Sun and Saturn is the same as that between the MC and the Descendant, for a particular latitude, then there is a paran line for the Sun on the MC / Saturn Setting along that latitude.
It is possible to display these paran lines on a map, but due to the potentially very large number of planetary pairs which would each have different paran lines, Solar Maps allows you to limit yourself to viewing the paran lines of a single chart point at a time, but paired with every other displayed point. This produces a more reasonable number of lines to display on the map at any one time.
For example, if you choose the Sun as your paran point, then Solar Maps will attempt to plot the paran lines for the Sun together with each other displayed chart point. (Note that the paran point does not have to be a currently displayed point. You can select any available point, including a fixed star, whether or not it is selected as a displayed point. To view parans of a star, you must first have opened a star file. See Opening a Star File for instructions on how to do this. )
You can also limit which paran line types are displayed according to the following categories.
• |
Rise/Set to Rise/Set - These lines show at what latitude pairs of planets (or stars) rise/rise, rise/set, set/rise or set/set at the same time. |
• |
Rise/Set to Culm/Anti - These lines show at what latitudes pairs of planets (or stars) either rise/culminate, rise/anticulminate, set/culminate or set/anticulminate. |
Selecting the paran point can be done either from the main screen of Solar Maps, or from within the “Select Lines” dialog box.
>> |
To select the paran point from the main screen |
Select the ”Paran Point...“ item from the “Chart“ menu.
>> |
To select the paran point from the “Select Lines” dialog box |
Click on the “Parans Of...“ button.
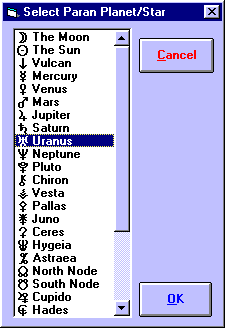
In either case, this will display the “Select Paran Point” dialog box.
>> |
To select the desired paran point |
1. |
Select an Item from the list of points. |
2. |
Click on the “OK“ button. |
You may only select a single point. If you highlight multiple entries, then you will get an error message telling you that you must select just a single point.
Note: If you have used the “Select Lines” dialog to display “All Parans”, then this option will have no effect. Any change you make to the selected Paran point will take effect only once you have switched off the “All Parans” option.